
Mega Dashboard › Guides
A 3D floor plan for your Home Assistant dashboard
Updated 7 October 2026
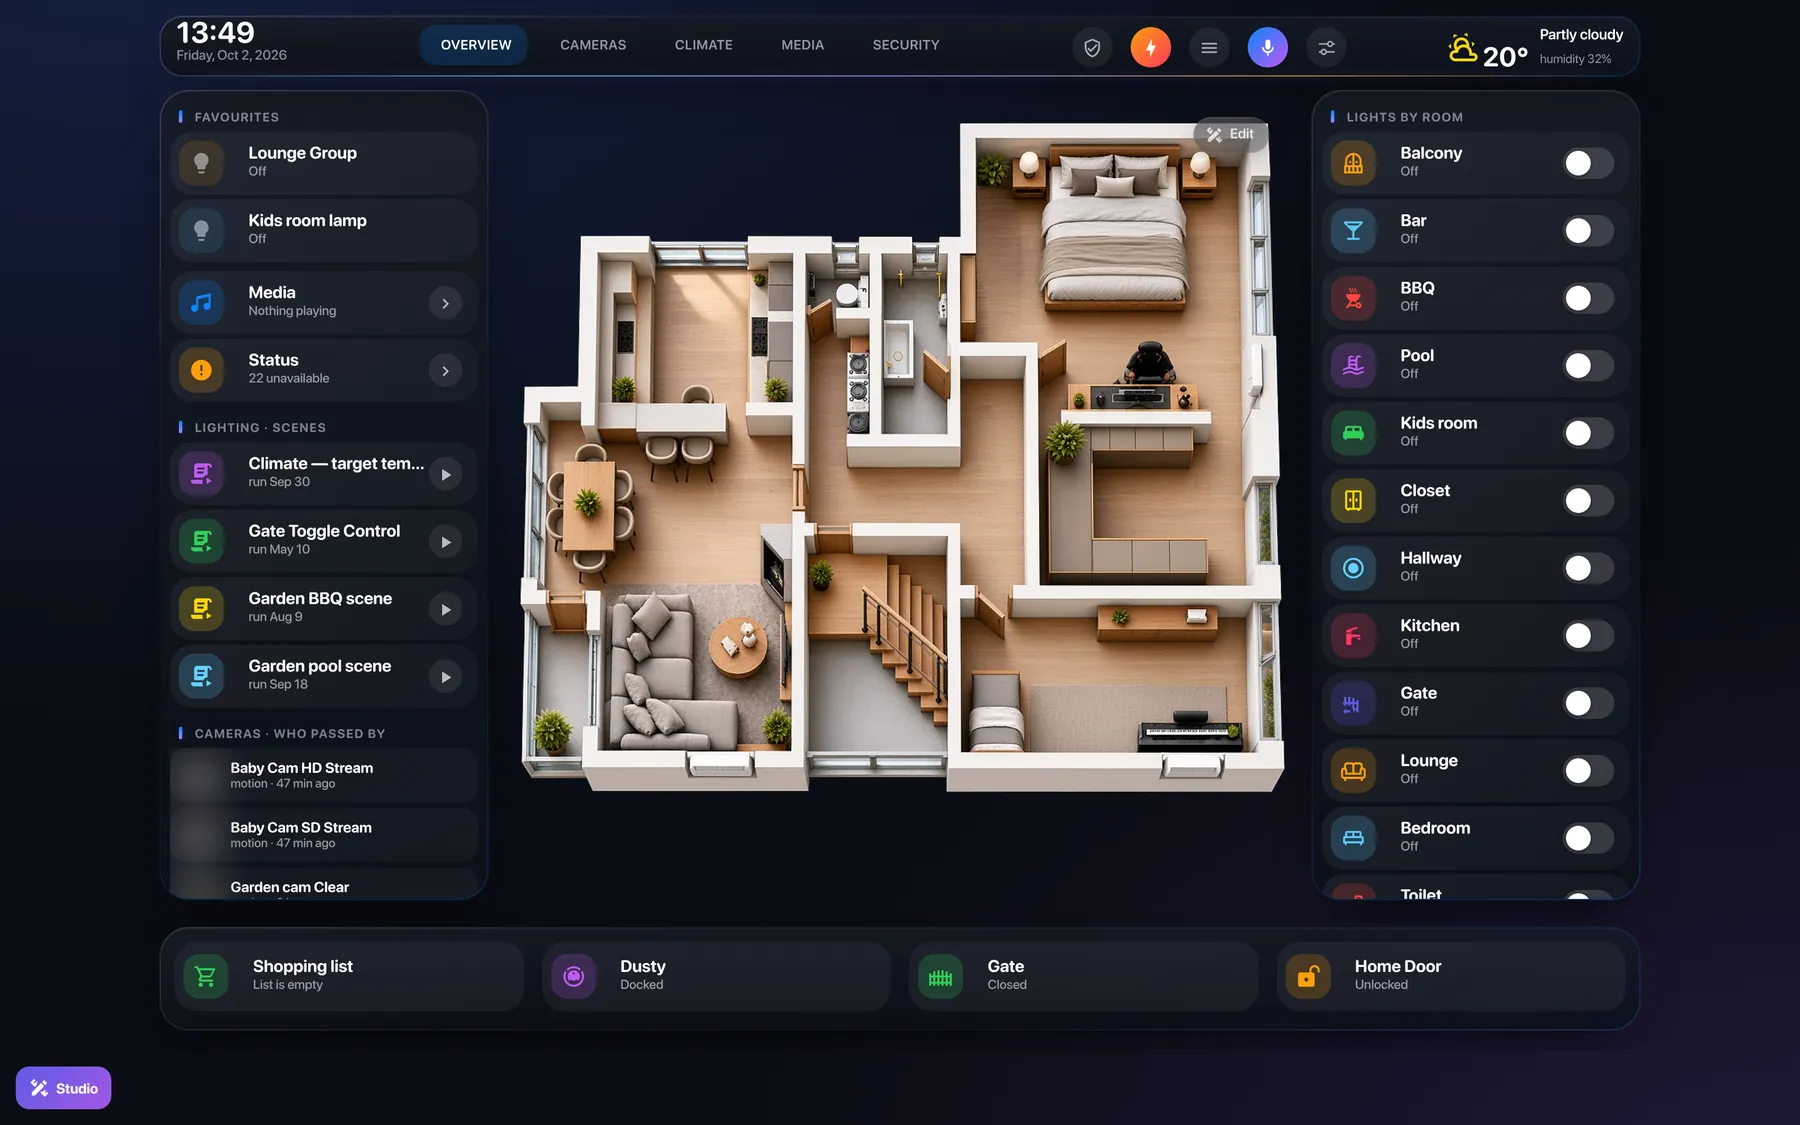
In short. Mega Dashboard for Home Assistant puts a 3D picture of your home in the middle of the dashboard and lets you place lights, sensors, cameras, the AC and the vacuum right on it — by tapping, not by writing YAML. Each light lights up its own room, a night version takes over after sunset, and devices get animations. It's free.
What you get
- Devices on the plan. Lights, switches, sensors, locks, cameras, climate, media players and the robot vacuum sit where they really are in the house. Tap one to switch it, hold it for details.
- Lights that light their room. Outline the room once and the light glows over exactly that area when it's on — no masks to draw in an image editor.
- Day and night. Upload a second, darker picture and it replaces the day one after sunset by itself.
- Animations. 33 ready ones: the fan spins, the AC blows cold or warm air, a leak glows red, a smart lock is green when locked and red when it's jammed. While a device is off, its animation stands still. You can also upload your own icon and give it an effect.
- Nothing moves when the picture changes. Replace the picture later and every device stays in its place.
- Phone, tablet and computer. Each screen keeps its own layout, so the plan can be large on the wall tablet and small on the phone.
How to make the picture of your home
You need one picture of the home seen from above — a floor plan or a 3D render, as PNG, JPG or WebP. Three free ways:
- Sweet Home 3D (on a computer) or Planner 5D (in the browser and on a phone): draw the walls, drop in furniture and save a top view.
- An AI image generator. The wizard gives you a ready prompt for ChatGPT, Gemini or similar. Upload your plan or a photo with it and you get a clean isometric picture.
- The architect's plan. A scanned plan works too; it just looks less 3D.
Set it up in three steps
- Install the app. Press Add to Home Assistant; Home Assistant adds the app store and opens Mega Dashboard. Install and start it.
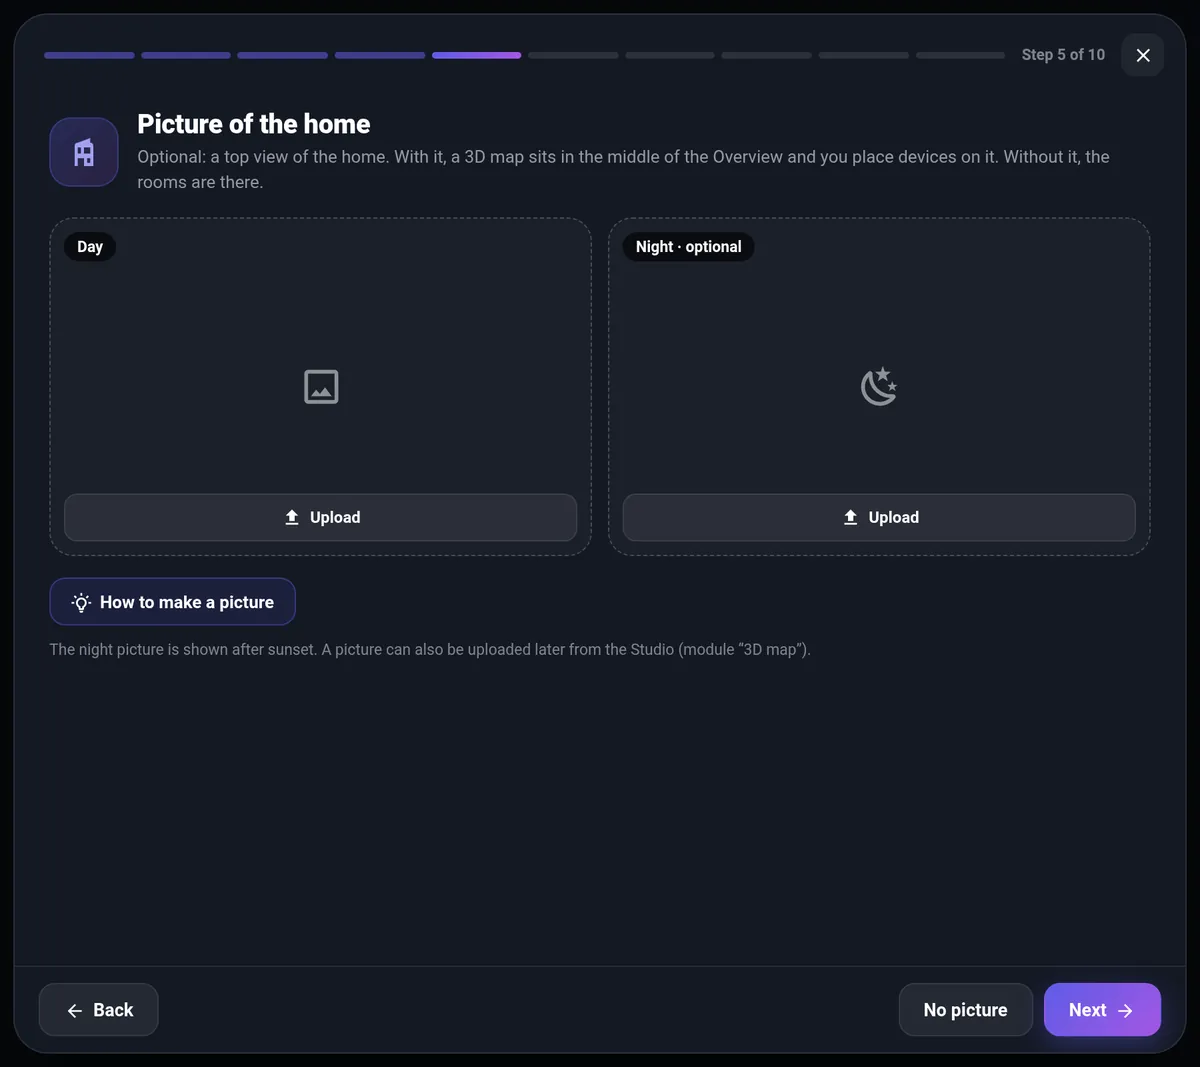
- Run the wizard. At the step “Picture of the home” upload the picture (and the night one if you have it). Already past the wizard? In the Studio add the module “3D map”.
- Place the devices. In the Studio drag each device to its spot and outline the rooms for the lights. Press Save — every save is kept in the history, so you can always go back.
How is this different from a 3D model card?
Cards like floor3d-card render a real 3D model (OBJ or GLB) that you can rotate, which is great if you already model your home in Blender or Sweet Home 3D and like configuring it in YAML. Mega Dashboard uses a picture instead: it loads fast on old wall tablets, looks as good as the render you give it, and the whole setup happens by tapping on the dashboard. More in the comparison.
Needs Home Assistant 2024.10+ (OS or Supervised as an app; Container or Core with Docker). Free to use.